Effizienter arbeiten mit PDFelement Benutzerhandbuch
PDFelement 11 Benutzerhandbuch
-
PDF auf Mac vergleichen
-
Mit PDFelement auf Mac Beginnen
-
PDF auf Mac Öffnen
-
PDF auf Mac Lesen
-
PDF auf Mac Erstellen
-
PDF auf Mac Kommentieren
-
PDF auf Mac Bearbeiten
- Bates-Nummern zu PDF auf Mac hinzufügen
- Kopf- und Fußzeilen zu PDF auf Mac hinzufügen
- Wasserzeichen zu PDF auf Mac hinzufügen
- Die Hintergrundfarbe in PDF auf Mac ändern
- Bilder in PDF auf Mac bearbeiten
- Link in einer PDF-Datei auf dem Mac bearbeiten
- Text in PDF auf Mac bearbeiten
- Tastenkombinationen für Mac
-
PDF auf Mac Zusammenführen
-
PDF auf Mac Organisieren
- Wie man Seiten zu einer PDF-Datei auf dem Mac hinzufügt
- Wie man PDF auf dem Mac komprimiert
- Wie man PDFs auf Mac zuschneidet
- Wie man Seiten aus PDF auf Mac löscht
- Wie man Seiten aus PDF auf Mac extrahiert
- Wie man eine PDF-Datei auf Mac dreht
- Wie man PDF-Seiten auf Mac teilt
- Seitenzahl zu PDF auf Mac hinzufügen
- PDF-Seitengröße ändern auf Mac
-
PDF OCR auf Mac
-
PDF auf Mac Konvertieren
-
Formular auf Mac Ausfüllen
- Daten aus PDF auf Mac extrahieren
- Wie man PDFs auf Mac ausfüllt
- Wie man eine PDF-Datei auf Mac manuell ausfüllbar macht
- Tab Nummer auf Mac anzeigen
- Interaktive Formulare automatisch erstellen
- PDF-Formulardaten auf Mac importieren/exportieren
- PDF-Formularausrichtung auf Mac
- PDF-Formulareigenschaften auf Mac
-
PDF auf Mac Schützen & Signieren
-
PDF auf Mac Drucken
-
PDF auf Mac Weitergeben
-
PDF KI Tools auf Mac
PDFelement Lernvideos
PDFelement 10 Benutzerhandbuch
PDFelement 9 Benutzerhandbuch
PDFelement 8 Benutzerhandbuch

Kurze Einführung in PDFelement für Mac
PDFelement für Mac ist ein leistungsstarkes PDF Tool, mit dem Sie schnell, kostengünstig und sicher ansprechende PDF-Dokumente und Formulare erstellen können. Mit dieser Anwendung können Sie:
- PDFs öffnen, erstellen, speichern, drucken und mit Anmerkungen versehen;
- Sie können jedes grafische Element in Ihrer PDF-Datei hinzufügen, entfernen, verschieben, in der Größe verändern und drehen;
- Sichern Sie Ihre PDFs mit einem Passwort;
- Konvertieren Sie PDF-Dokumente in Word-, HTML-, Text- und Bilddateien;
- Erstellen Sie interaktive Formularfelder und erkennen Sie Formularfelder automatisch;
- Fügen Sie Seitenzahlen, Bates-Nummerierung und Seitenelemente ein;
- Kombinieren Sie mehrseitige PDFs zu einem einzigen langen Bild;
- Erkennen Sie Text in Bildern mit OCR;
- Exportieren Sie Notizen, die Art der Notiz und den Ort der Notiz;
- Fügen Sie dem Dokument ein Signaturbild hinzu;
- Führen Sie partielle OCR für bestimmte benutzerdefinierte Felder in gescannten PDFs durch;
- Stapeldruck, Konvertierung, OCR-Erkennung, Bates-Nummerierung, Wasserzeichen, Hintergrund hinzufügen, Datenextraktion, etc.
Dieser Abschnitt hilft Ihnen, sich mit der Benutzeroberfläche von PDFelement für Mac vertraut zu machen.
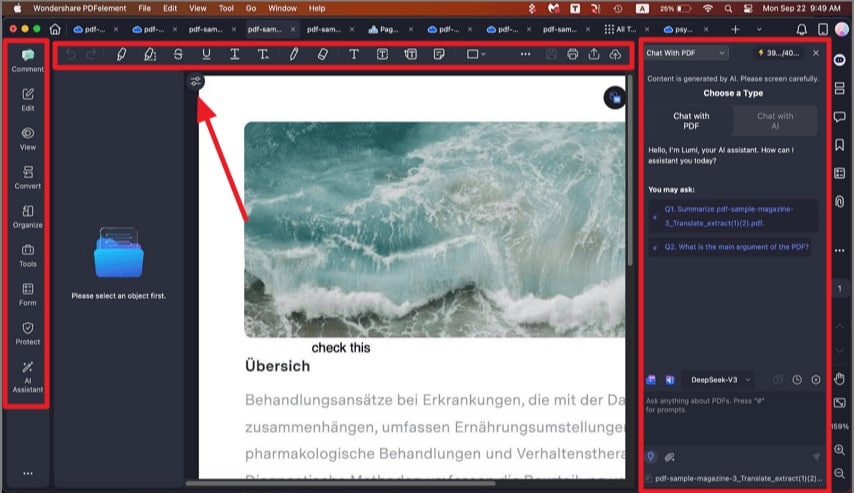
Produktübersicht
1. Dateimenü
- Klicken Sie im oberen Menü auf "Datei" und es werden weitere Optionen angezeigt.
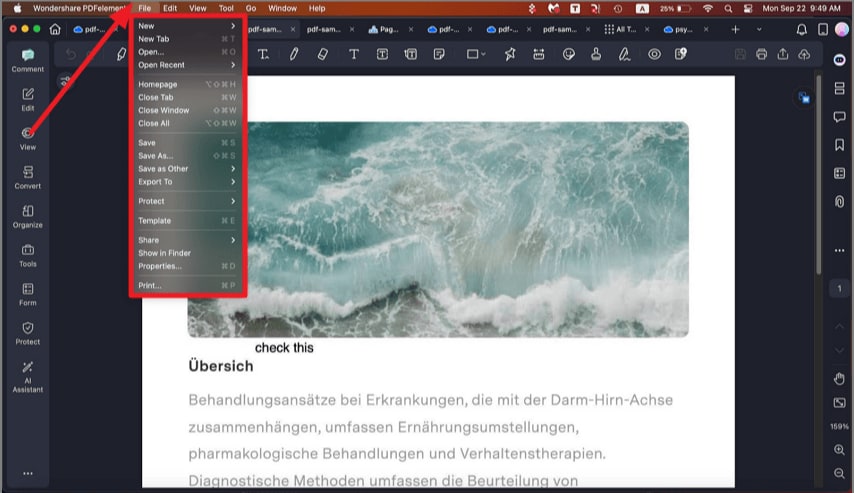
Dateimenü
- Neu: PDF aus Datei, Fensteraufnahme, Auswahlaufnahme, Bildschirmaufnahme, Zwischenablage und Scanner erstellen oder Sie können mit der Erstellung eines leeren Dokuments ganz von vorne beginnen.
- Neue Registerkarte: Öffnen Sie eine PDF-Datei in einer neuen Registerkarte.
- Öffnen: Öffnen Sie PDF-Dateien, indem Sie lokale Ordner durchsuchen oder die zuletzt geöffneten Dateien öffnen.
- Zuletzt geöffnet: Öffnen Sie eine PDF-Datei, die Sie kürzlich geöffnet haben.
- Cloud öffnen: Öffnen Sie die Wondershare PDFelement Cloud und erhalten Sie Zugriff auf die darin gespeicherten Dateien.
- Fenster/Registerkarte/Alle schließen: Schließen Sie die von Ihnen ausgewählten Fenster und kehren Sie zur Startoberfläche zurück.
- Speichern: Speichern Sie PDF-Dokumente im Zielordner.
- Speichern unter: Speichern Sie das aktuelle PDF-Dokument als neue Kopie in dem von Ihnen gewählten Zielordner.
- Speichern als andere: Wählen Sie je nach Bedarf Speichern als geglättetes, komprimiertes PDF oder archivierbares PDF (PDF/A-2b).
- Exportieren in: Konvertieren Sie PDF-Dateien in andere Formate, z.B. Word, Excel, PowerPoint, Bild, epub, txt, html und rtf.
- Schützen: Schützen Sie Ihre Dateien mit einem Passwort. Es gibt drei Optionen unter dieser Schaltfläche: Mit Passwort verschlüsseln, Sicherheit entfernen und Sicherheitseigenschaften.
- Im Finder anzeigen: Finden Sie das Ziel der Datei.
- Eigenschaften: Prüfen Sie die aktuellen PDF-Dokumentbeschreibungen, Dateidetails und die Sicherheit.
- Teilen: Teilen Sie Ihre Dateien über Mail, Nachrichten, AirDrop, Notizen, Wondershare Cloud und mehr.
- Drucken: Drucken Sie die aktuelle PDF-Datei auf Papierdokumente.
2. PDFelement-Menü

PDFelement-Menü
- Über PDFelement: Überprüfen Sie die Versionsnummer von PDFelement für Mac.
- Voreinstellungen: Legen Sie die Einstellungsoptionen für PDFelement für Mac fest, einschließlich Erscheinungsbild, Allgemeine Einstellung, Einstellung für Kommentare und Plugin.
3. Suchfunktion
Sie sind sich nicht sicher, welche Funktion Sie bei der Bearbeitung von PDF-Dateien auswählen sollen? Sie wissen nicht, wo die richtige Taste ist? PDFelement für Mac hat jetzt eine praktische Suchfunktion in die Software eingebaut, mit der Sie die gewünschte Funktion finden können. Die folgenden Schritte beschreiben, wie Sie dieses leistungsstarke Tool verwenden.
- Klicken Sie im oberen Menü auf "Hilfe" und Sie sehen das Suchfeld.
- Geben Sie die Funktion oder den Inhalt ein, den Sie suchen und wählen Sie den gewünschten Menübegriff aus oder überprüfen Sie die relevanten Hilfethemen in den Suchergebnissen.
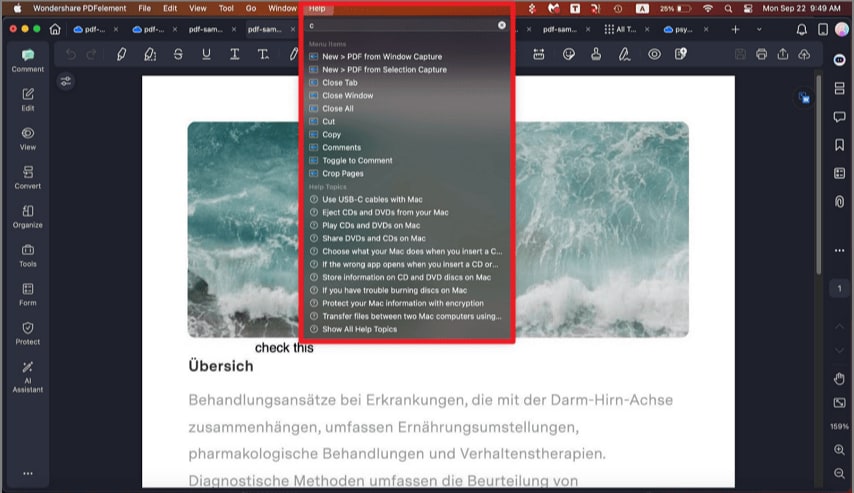
Suchfunktion